hugo搭建+腾讯云轻量应用服务器托管博客
hugo安装
在chocolatey官网下载chocolatey管理包
命令行中安装hugo:
choco install hugo -confirm
安装hugo-extended(扩展版本):
choco install hugo-extended -confirm
hugo version检查:hugo v0.139.0-dacef0df92a9a20072b4eaa42003e1a63ace8f41+extended windows/amd64 BuildDate=2024-11-18T16:17:45Z VendorInfo=gohugoio
部署到github上
关于这一块小白们都可以参加网上的流程,很多都比较详细,我就不赘述了,简单讲两句
github创建自己的用户名.GitHub.io仓库并clone到本地的blog文件夹中
命令行中输入 hugo new site nan0in27创建文件夹
cd nan0in27
cd themes
从官网下载主题stack
然后开始配置
选做
删除content中的rich content(因为有外网视频会导致预览过慢)
下载完后将stack中examplesite文件夹中的content和hugo.yaml复制到根目录,删除原来的hugo.taml(本质上就是一个东西)
语言编码(国际化).md文件:Chinese-test文件夹中有index.zh-cn.md(中文部分)
英文编号:xx.en.md
命令行中输入hugo new content post/firstBlog/index.md创建新博客
config设置:
进入hugo.yaml文档进行设置:(这里只列出一些注意点)
go语言的年月日表达非常奇葩(吐槽),到官方stack的文档中去查看操作
在运行example网站时发现头像,进入文档后修改:
1
2
3
4
avatar :
enabled : true
local : true
src : img / avatar . png
然后我们发现img在assets文件夹中,我们仿照着在根目录assets中创建img文件夹放入我们的头像图片,读取时会直接覆盖掉theme原文件中的空白头像
关于评论:
评论的disqus我个人觉得不太符合我的使用习惯,于是改成了utterances:
utterances
1 介绍
utterances 🔮 是利用Github仓库的 Issue 来实现,完全免费
2 使用方法
(1) 前往【utterances app】,安装app,选择要安装的仓库,建议直接安装在博客静态页面的仓库,其他仓库也可以
(2) 在hugo的配置文件 hugo.yaml 中找到 comments->provider参数,填入utterances
(3) 找到comments->utterances参数,修改 repo ,填上对应的仓库就好{你的github名}/{仓库名}
建议把评论邮箱通知给关掉,否则评论一次就发一次邮件,头疼 😓
一些设置方式来自https://www.xalaok.top/post/stack-modify/文章名:Hugo-theme-Stack 魔改美化:
Waline
官方文档
【建站技术】为你的 Hugo 博客加入评论功能 (Waline)
【索引】定制自己的 Waline 评论系统 | 半方池水半方田
将Waline导向你的国内域名以实现加速
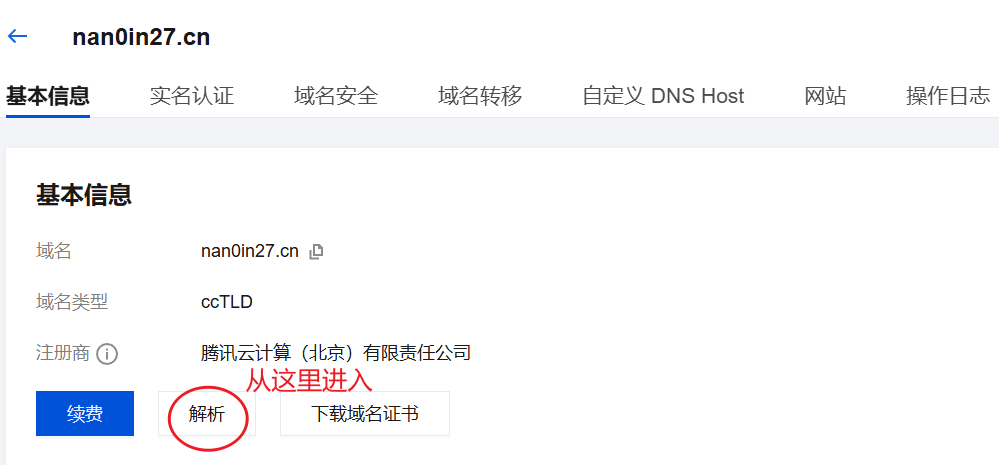
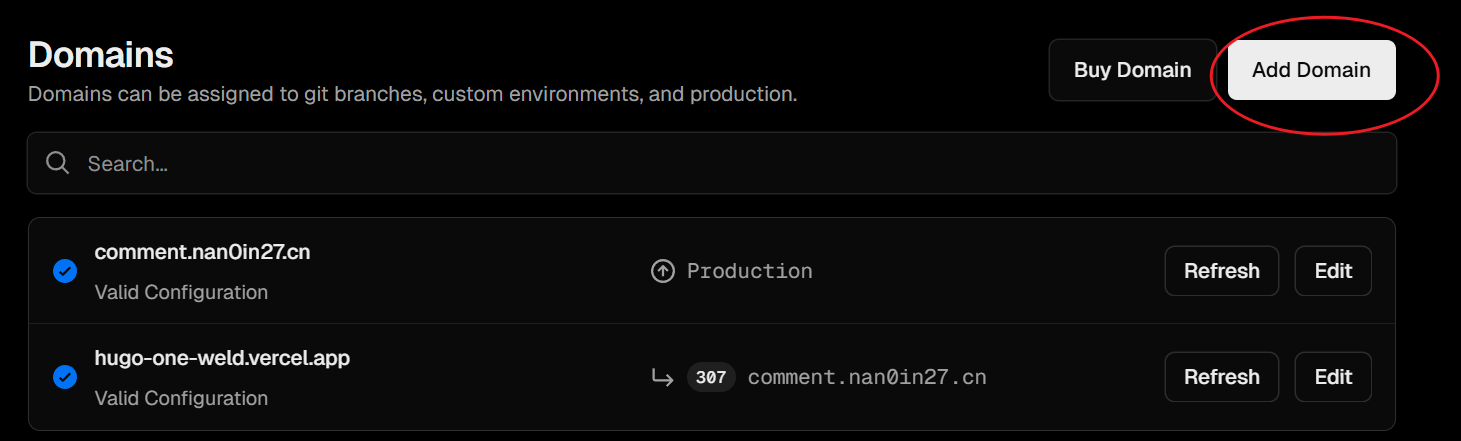
首先你得有一个已经申请了的国内域名和相关服务,我的就是nan0in27.cn,在腾讯云上通过添加二级域名并且CNAME解析指向原本的vercel服务就可以修改原本vercel的waline地址了
在你的vercel服务中导向二级域名即可
Qmsg酱实现QQ通知
主题配置
基础配置
零碎玩意+菜单栏圆角+滚动条+加载进度条+双栏+卡片缩放动画+布局+右侧导航栏动画+首页欢迎条幅
然后就是巴拉巴拉修改一些小部分的文档
记得跟着stack的官方文档来,我在加链接图标的时候发现官方提供的tabler icons才是最好用的
在github创建用户名.GitHub.io
然后按着指令将我们的public文件夹git上去,blog就部署好了
接下来要实现自动部署(github page仅限)文章
视频
友链、归档多列显示
修改assets/scss/custom.scss文件(不存在则自行创建),引入以下css样式代码
 1
 2
 3
 4
 5
 6
 7
 8
 9
10
11
12
13
14
15
16
17
18
19
@ media ( min-width : 1024px ) {
. article-list--compact {
display : grid ;
// 目前是两列,如需三列,则后面再加一个1fr,以此类推
grid-template-columns : 1 fr 1 fr ;
background : none ;
box-shadow : none ;
gap : 1 rem ;
article {
background : var ( -- card - background );
border : none ;
box-shadow : var ( -- shadow - l2 );
margin-bottom : 8 px ;
margin-right : 8 px ;
border-radius : 16 px ;
}
}
}
然后做完初始的准备觉得差不多就hugo server生成你网页的public文件夹即可
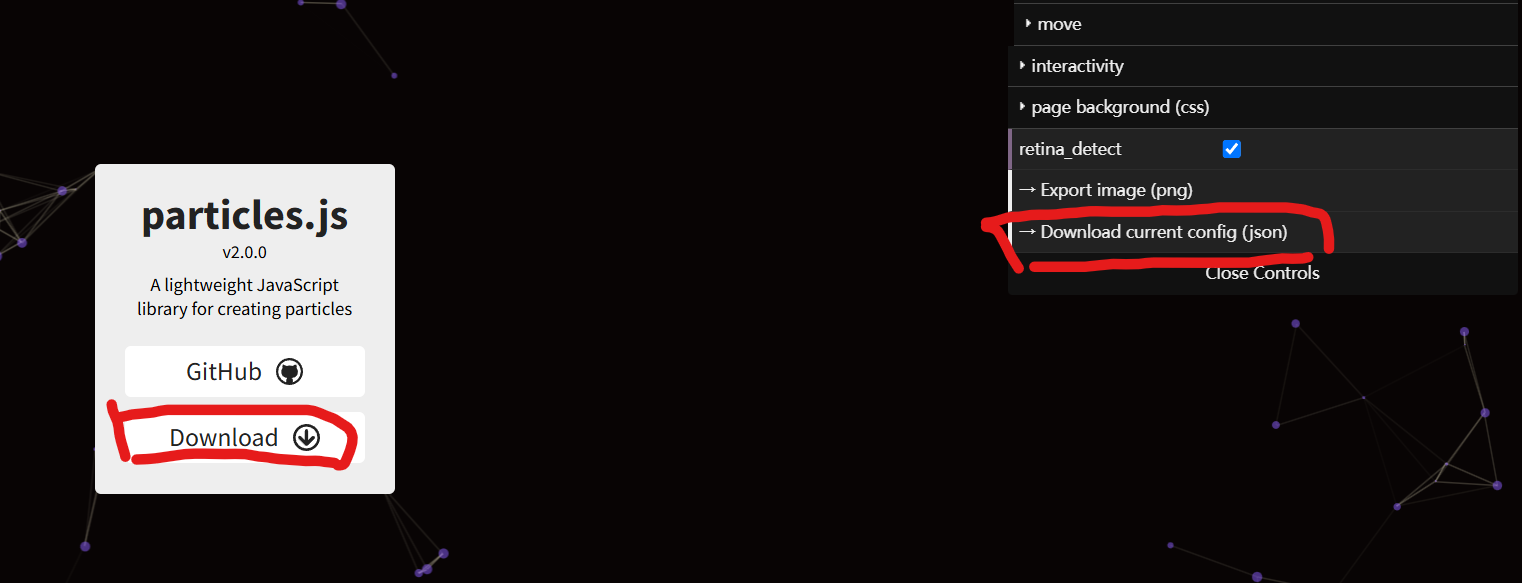
引入动态粒子背景(particles.js)
配置页面
detect_on 调整为window 下载配置文件,以及 particles.js 所需要的js文件
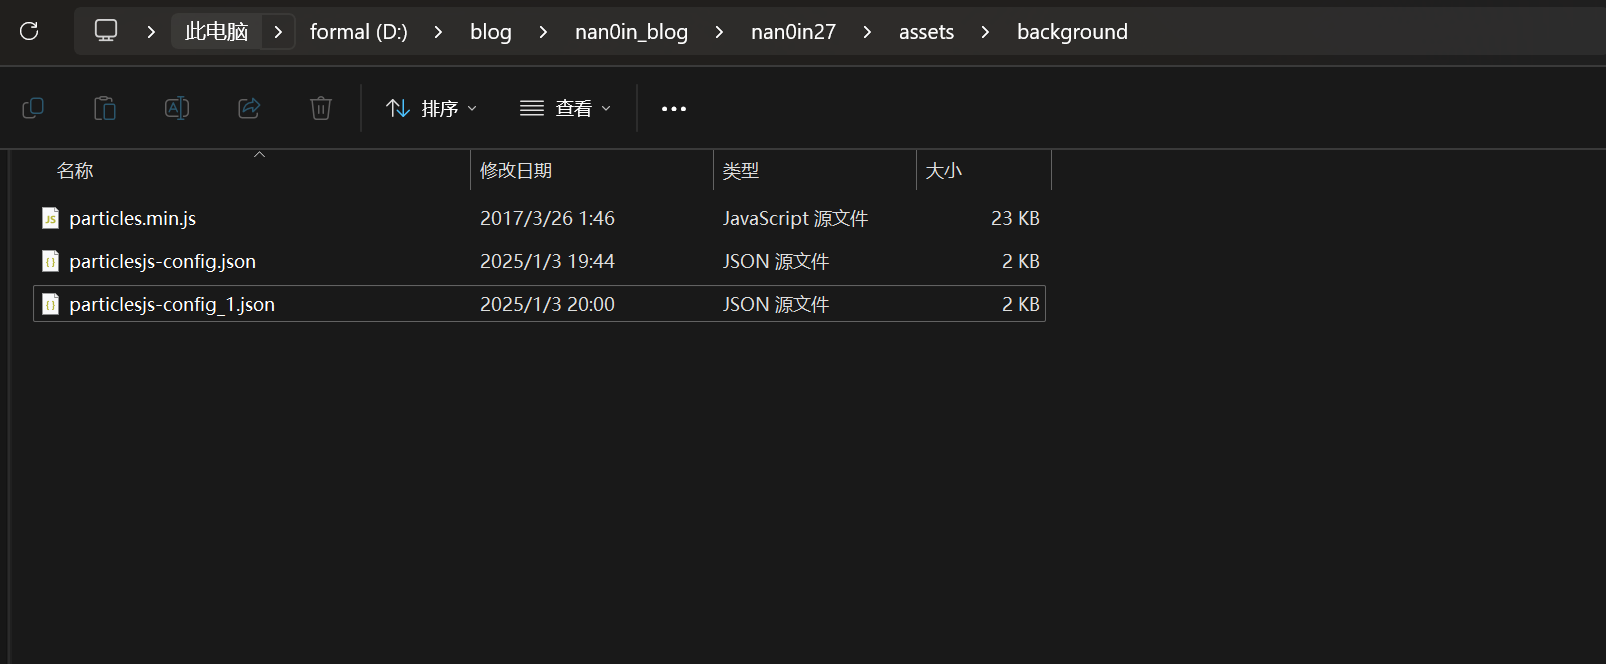
这里我们需要两个文件,一个是particlesjs-config.json文件,一个是particles.min.js文件
assets/background下(没有就创建),然后在layouts/partials/footer/custom.html中引入如下代码
 1
 2
 3
 4
 5
 6
 7
 8
 9
10
11
12
13
14
15
16
17
18
19
< div id = "particles-js" ></ div >
<! -- 使用 Hugo 资源获取功能 -- >
< script src = "{{ (resources.Get " background / particles . min . js ").Permalink }}" ></ script >
< script >
particlesJS . load ( 'particles-js' , '{{ (resources.Get "background/particlesjs-config_1.json").Permalink }}' , function () {
console.log('particles.js loaded - callback') ;
} );
</ script >
< style >
# particles-js {
position : fixed ;
top : 0 ;
left : 0 ;
width : 100 % ;
z-index : -1 ;
}
</ style >
刷新hugo缓存后重新运行hugo server就可以看到了
在这里提供我的 配置文件
归档页添加标签云
主页的标签云太碍眼就去掉了,然后添加到了归档界面中
在layouts/_default/archives.html(没有就创建一个)的</header>中添加
 1
 2
 3
 4
 5
 6
 7
 8
 9
10
11
12
13
14
15
16
17
18
{{- $taxonomy := $.Site.GetPage "taxonomyTerm" "tags" -}}
{{- $terms := $taxonomy.Pages -}}
{{ if $terms }}
< section class = "widget tagCloud" >
< h2 class = "section-title" > {{ $taxonomy.Title }}</ h2 >
< div class = "tagCloud-tags" >
{{ if ne (len $.Site.Taxonomies.tags) 0 }}
{{ range $name, $taxonomy := $.Site.Taxonomies.tags }}
{{ $tagCount := len $taxonomy.Pages }}
< a href = "{{ " / tags /" | relURL }}{{ $ name | urlize }}" class = "tagCloud-tags" >
{{ $name }}< span class = "tagCloud-count" > {{ $tagCount }}</ span >
</ a >
{{ end }}
{{ end }}
</ div >
< section >
{{ end }}
在归档列表里面显示文章副标题/简介
在assets/scss/partials/article.scss中找到.article-list--compact,并修改
1
2
3
4
5
6
7
8
9
// 显示文章副标题
. article-subtitle {
margin-top : -5 px ;
font-size : 1.5 rem ;
@include respond(md) {
font-size : 1.6 rem ;
}
}
最后在layouts/partials/article-list/compact.html
添加在article-title后
1
2
3
4
5
6
<!-- 显示文章副标题 -->
{{ with .Params.description }}
< div class = "article-subtitle" >
{{ . }}
</ div >
{{ end }}
修改字体
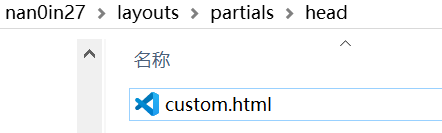
首先我们在自己的主博客文件夹的layouts/partials/head下创建一个 custom.html 用来进行渲染,然后我们需要一个有字体的scss文件进行渲染,这里取nan0in27\themes\hugo-theme-stack\assets\scss中的variables.scss,这个就是渲染字体的地方custom.html
 1
 2
 3
 4
 5
 6
 7
 8
 9
10
11
12
13
14
15
16
< style >
: root {
--article-font-family : "Noto Serif SC" , var ( -- base - font - family );
}
</ style >
< script > // 正文自重300,标题字重700
( function () {
const customFont = document . createElement ( 'link' );
customFont . href = "https://fonts.googleapis.com/css2?family=Noto+Serif+SC:wght@400;700&display=swap" ;
customFont . type = "text/css" ;
customFont . rel = "stylesheet" ;
document . head . appendChild ( customFont );
}());
</ script >
variables.scss调整--zh-font-family和--base-font-family的顺序
1
2
--zh-font-family : "Noto Serif SC" , "Hiragino Sans GB" , "Droid Sans Fallback" , "Microsoft YaHei" ;
--base-font-family : "Noto Serif SC" , var ( --sys-font-family ), var ( --zh-font-family ), sans-serif ;
还可参考链接
nginx部署到服务器
最重量级的一步,出了不知多少错,国内网站没备案记得要去备案!!!大概会画一个月左右流程
关于服务器等前置准备
本人于2024双十一购买了腾讯云的轻量应用服务器,2核2G4M带宽和40G系统盘作为个人博客来说够用了。然后购买了一个自己的域名(com很贵别想了),一定想想好,备案了后续后悔就很麻烦了。
安装nginx
sudo apt install nginx
设置开机启动nginx
sudo systemctl enable nginx
启动nginx
sudo systemctl start nginx
查看状态
sudo systemctl status nginx
然后你就可以在浏览器中输入你的服务器公网ip地址,看到nginx的欢迎页面了。
打开DNS解析(如果事先备案的话)
首先要记得在控制台打开你的dns解析(备案的时候关了之后就忘了开了哎哟)
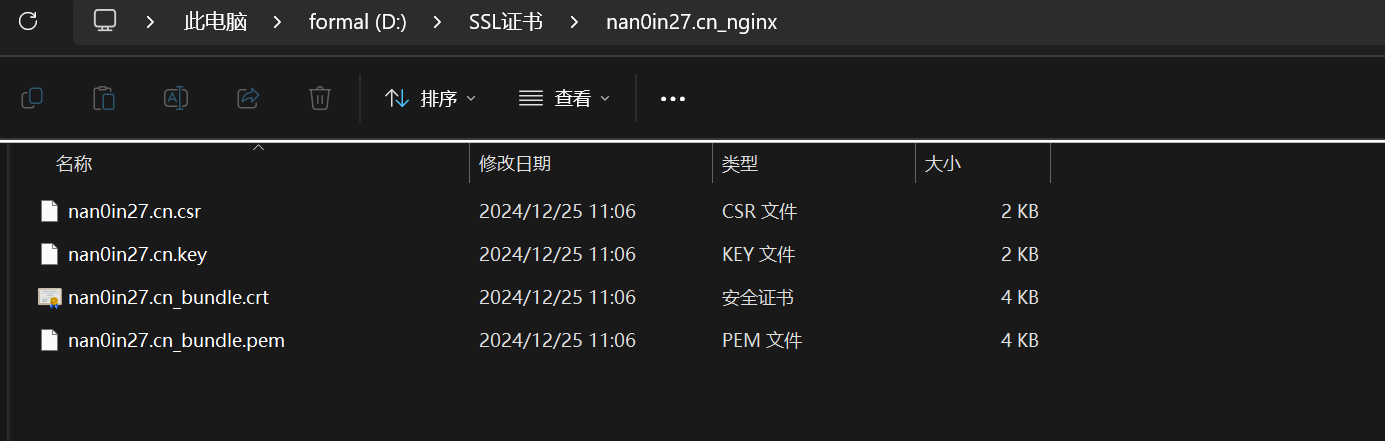
配置https所需ssl证书
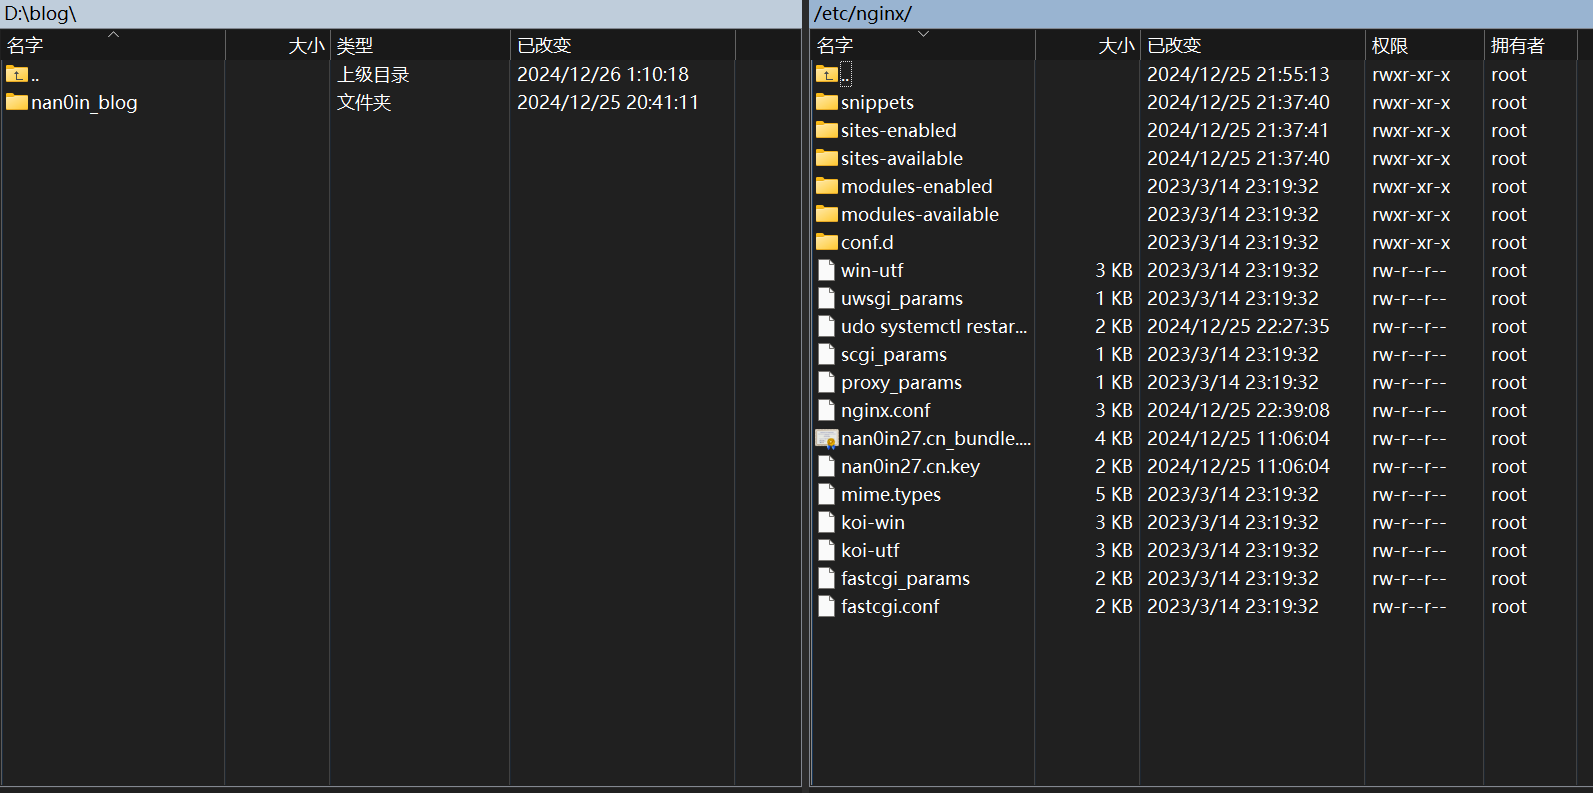
在腾讯云下载ssl证书,然后上传到服务器上的nginx 文件夹中。注意上传*_bundle.crt*和.key 两个文件即可,winscp直接拖过去,如下图
防火墙设置
打开你滴80 和443 端口
也可以参考这篇文章
1
2
3
sudo firewall-cmd --permanent --zone= public --add-service= http
sudo firewall-cmd --permanent --zone= public --add-service= https
sudo firewall-cmd --reload
并且确保你的端口没有被占用
1
2
sudo netstat -tulpn | grep :80
sudo netstat -tulpn | grep :443 #没有返回任何消息就没占用
传输文件
在home下创立public文件夹,然后终端里调到博客目录下,但是不要进入public文件夹,因为public后面的/表示public文件夹里面的内容
WINSCP是一款很好用的软件,你可以直接把文件拖过去(爽)
配置nginx的nginx.conf文件‼️‼️
定位到/etc/nginx目录下,然后输入sudo vim nginx.conf/开始配置文件
这里要比较耐心,不懂的地方多搜多找答案(如果我可以解决你也可以来私我),附上我的配置文件(仅供参考,多余的信息删去了)
 1
 2
 3
 4
 5
 6
 7
 8
 9
10
11
12
13
14
15
16
17
18
19
20
21
22
23
24
25
26
27
28
29
30
31
32
33
34
35
36
37
38
39
40
41
42
43
44
45
46
47
48
49
50
51
52
53
54
55
56
57
58
59
60
61
62
63
64
65
66
67
68
69
70
71
72
73
74
75
76
77
78
79
80
81
82
83
84
user root;
worker_processes auto;
pid /run/nginx.pid;
error_log /var/log/nginx/error.log;
include /etc/nginx/modules-enabled/*.conf;
events {
worker_connections 768;
}
http {
log_format main '$remote_addr - $remote_user [$time_local] "$request" '
'$status $body_bytes_sent "$http_referer" '
'"$http_user_agent" "$http_x_forwarded_for"' ;
access_log /var/log/nginx/access.log main;
sendfile on;
tcp_nopush on;
tcp_nodelay on;
keepalive_timeout 65;
types_hash_max_size 2048;
include /etc/nginx/mime.types;
default_type application/octet-stream;
include /etc/nginx/conf.d/*.conf;
# 配置http
server {
# 要配置的第二个地方,80访问端口
listen 80 default_server;
listen [ ::] :80 default_server;
# 要配置的第三个地方,域名
server_name www.nan0in27.cn;
rewrite ^( .*) https://$server_name$1 permanent; #自动从http跳转到https
# 要配置的第四个地方,这里指向public文件夹
root /home/public;
include /etc/nginx/default.d/*.conf;
# 要配置的第五个地方
location / {
root /home/public;
index index.html index.htm;
}
# 要配置的第六个地方
error_page 404 /404.html;
location = /40x.html {
root /home/public;
}
error_page 500 502 503 504 /50x.html;
location = /50x.html {
}
}
# 配置https
server {
listen 443 ssl;
# 要配置的第七个地方
server_name www.nan0in27.cn;
root /home/public;
# 要配置的第八个地方
ssl_certificate /etc/nginx/nan0in27.cn_bundle.crt;
ssl_certificate_key /etc/nginx/nan0in27.cn.key;
# 要配置的第九个地方,可以按照我的写法
ssl_session_timeout 10m;
ssl_protocols TLSv1 TLSv1.1 TLSv1.2;
ssl_ciphers ECC-SM4-SM3:ECDH:AESGCM:HIGH:MEDIUM:!RC4:!DH:!MD5:!aNULL:!eNULL;
ssl_prefer_server_ciphers on;
# 要配置的第十个地方
error_page 404 /404.html;
location = /404.html {
root /home/public;
}
include /etc/nginx/default.d/*.conf;
}
}
端口 80 用于配置 http 服务,端口 443 用于配置 https 服务
哦对了,可以安装含有剪贴板集成的vim-gtk,这样方便你进行输入,在终端输入
sudo apt-get install vim-gtk3
然后查看
`vim –version | grep clipboard
如果clipboard前面有+,那你就成功了
最后的运行
重新加载配置文件:
检查 nginx 服务的运行情况
1
sudo systemctl status nginx
有问题一定要去看access.log和error.log分析错误!!这样才能提高解决效率
重启 nginx 服务
1
sudo systemctl restart nginx
这时候你再去看状态就能看到一系列process的情况了
通过域名访问网站,如果出现博客首页,说明配置成功了,如果域名还没有备案成功,用ip地址访问也可以跳转到博客首页
后续
文章本地写好,public文件上传即可,如果我做自动部署了也会同步更新文章的。
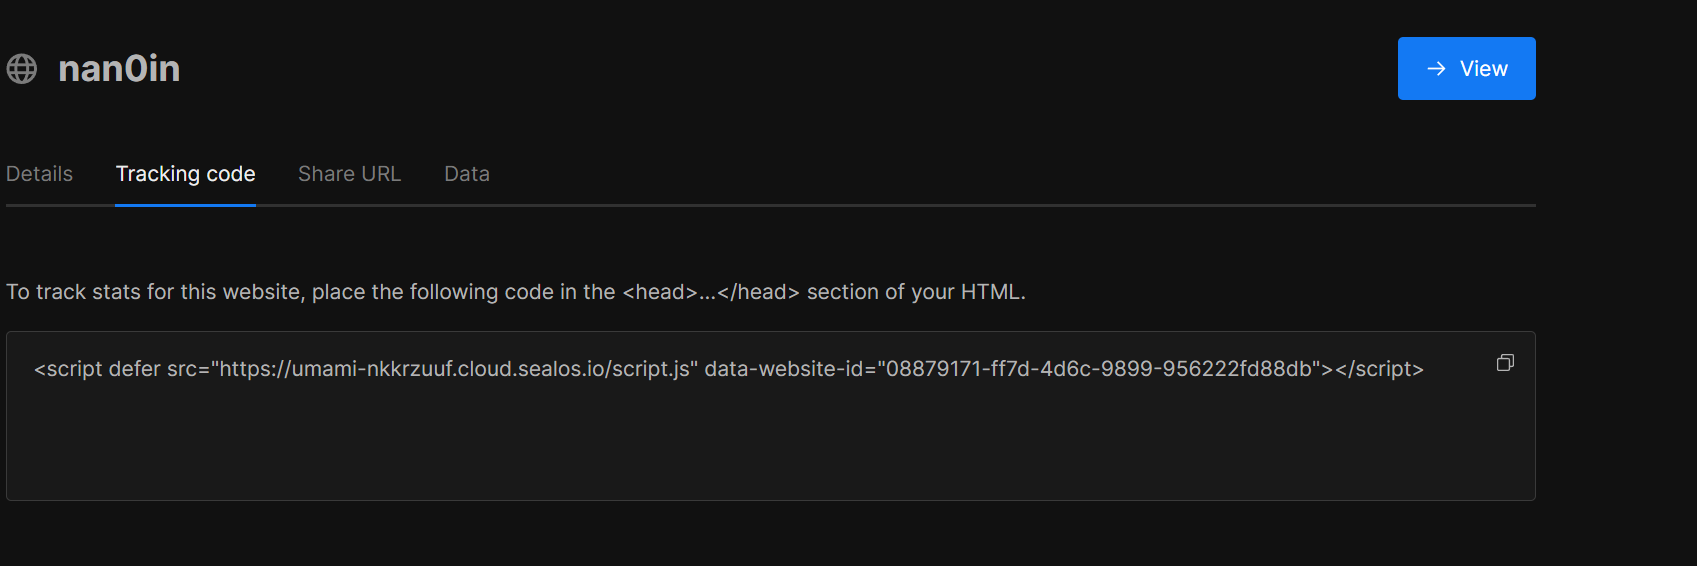
使用Umami统计个人网站访问数据
个人隐私管理很重要,没人想被视奸👁️。作为一个个人网站,是时候学会个人关注好各种数据来保护自己了。全程匿名化,守护隐私至上
为什么选择Umami
Umami 是一个开源的、以隐私为中心的 Google Analytics 替代方案。Umami 提供强大的网络分析解决方案,不会侵犯用户隐私。此外,当自行托管 Umami 时,可以完全控制自己的数据。
Umami基于Node.js开发,支持Mysql数据库,除服务器外它甚至可以部署在 Serverless 中。自部署的好处在于某些商业服务滥用用户数据,当数据保存在自己手中时可以确保不会分享给第三方(如果你查阅 Umami 的数据库,你甚至可以发现它连用户 IP 都没有收集)。
一键部署
通过链接
APP SECRET 随便填
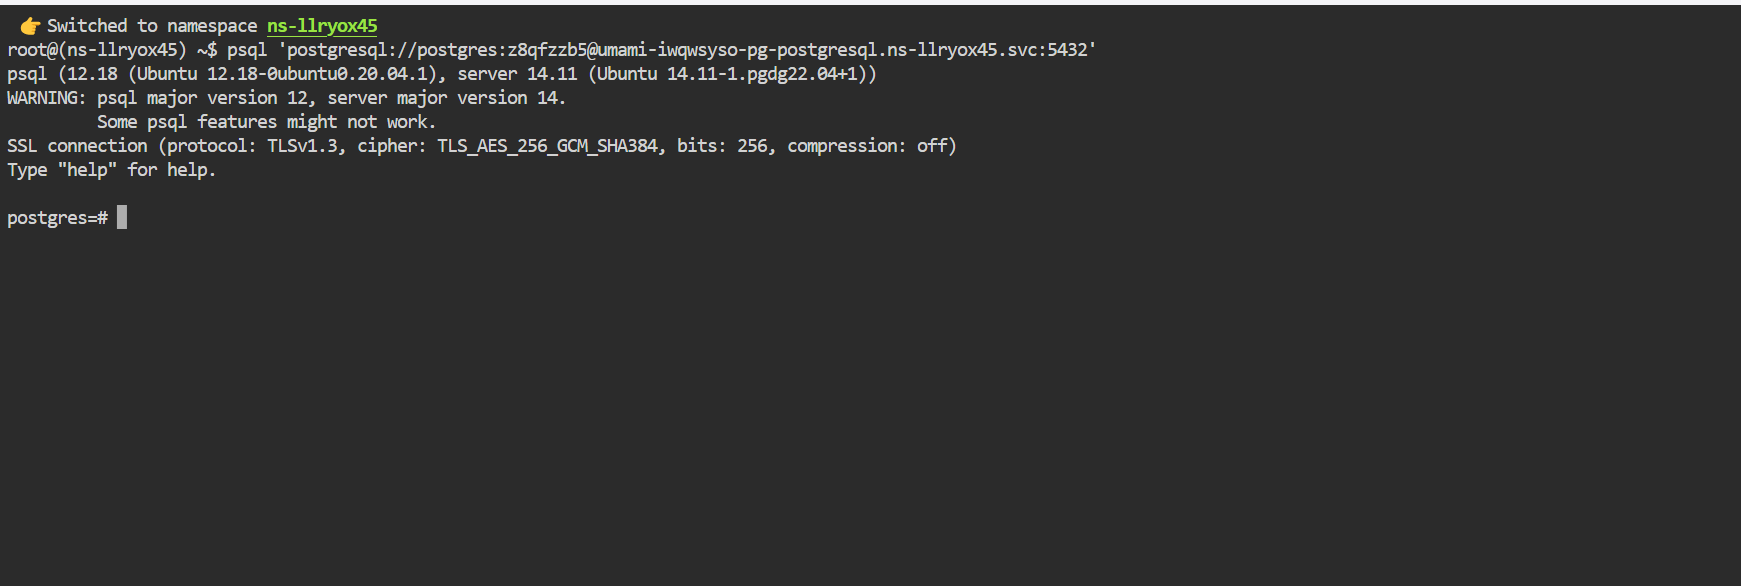
进入数据库
在主页通过数据库 进入数据库详情页面,连接进入终端
输入create database umami;新建数据库
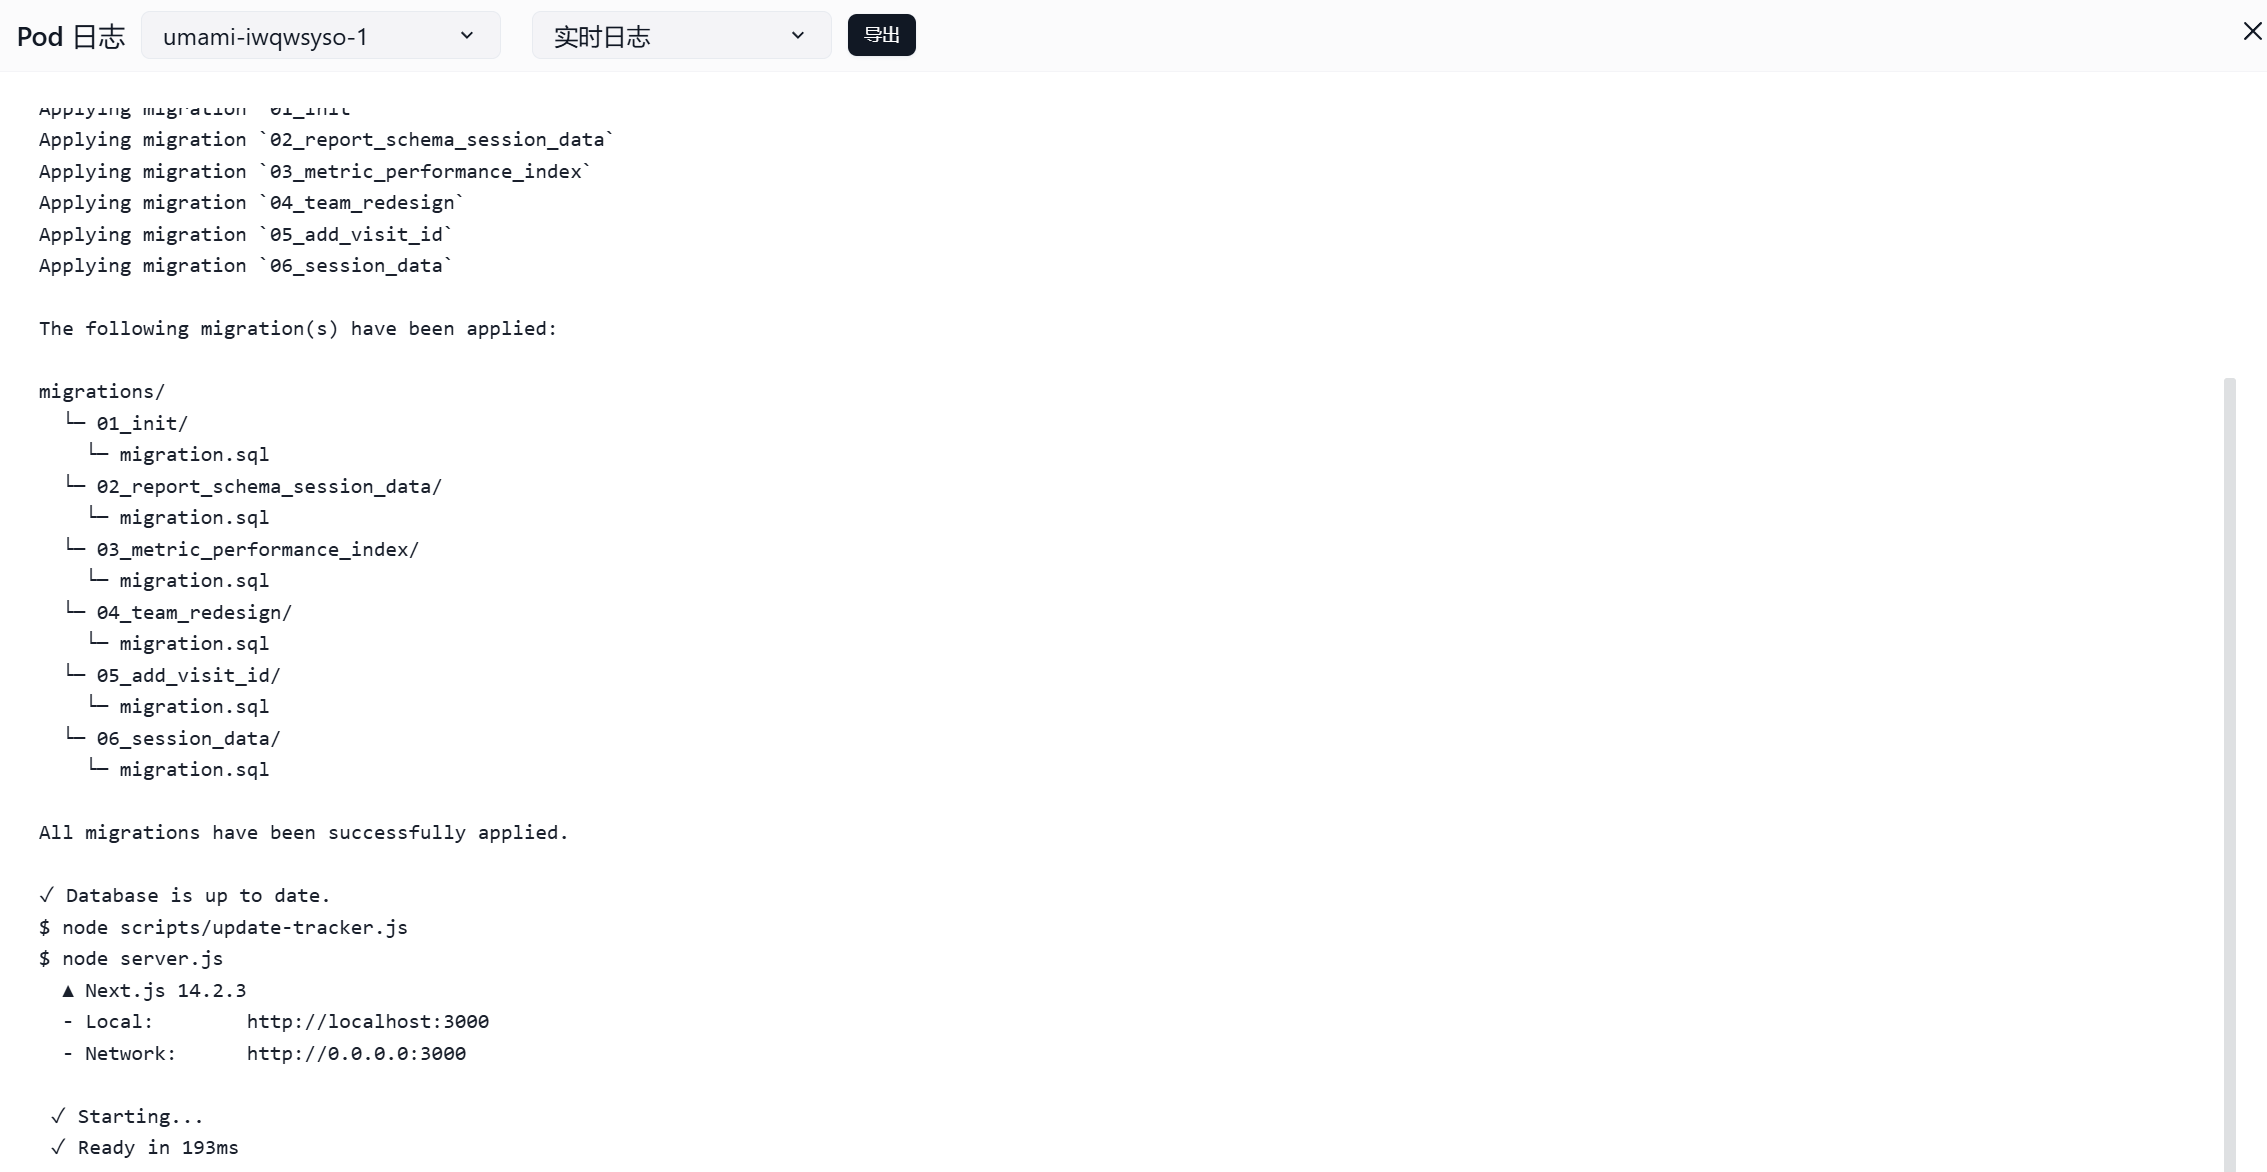
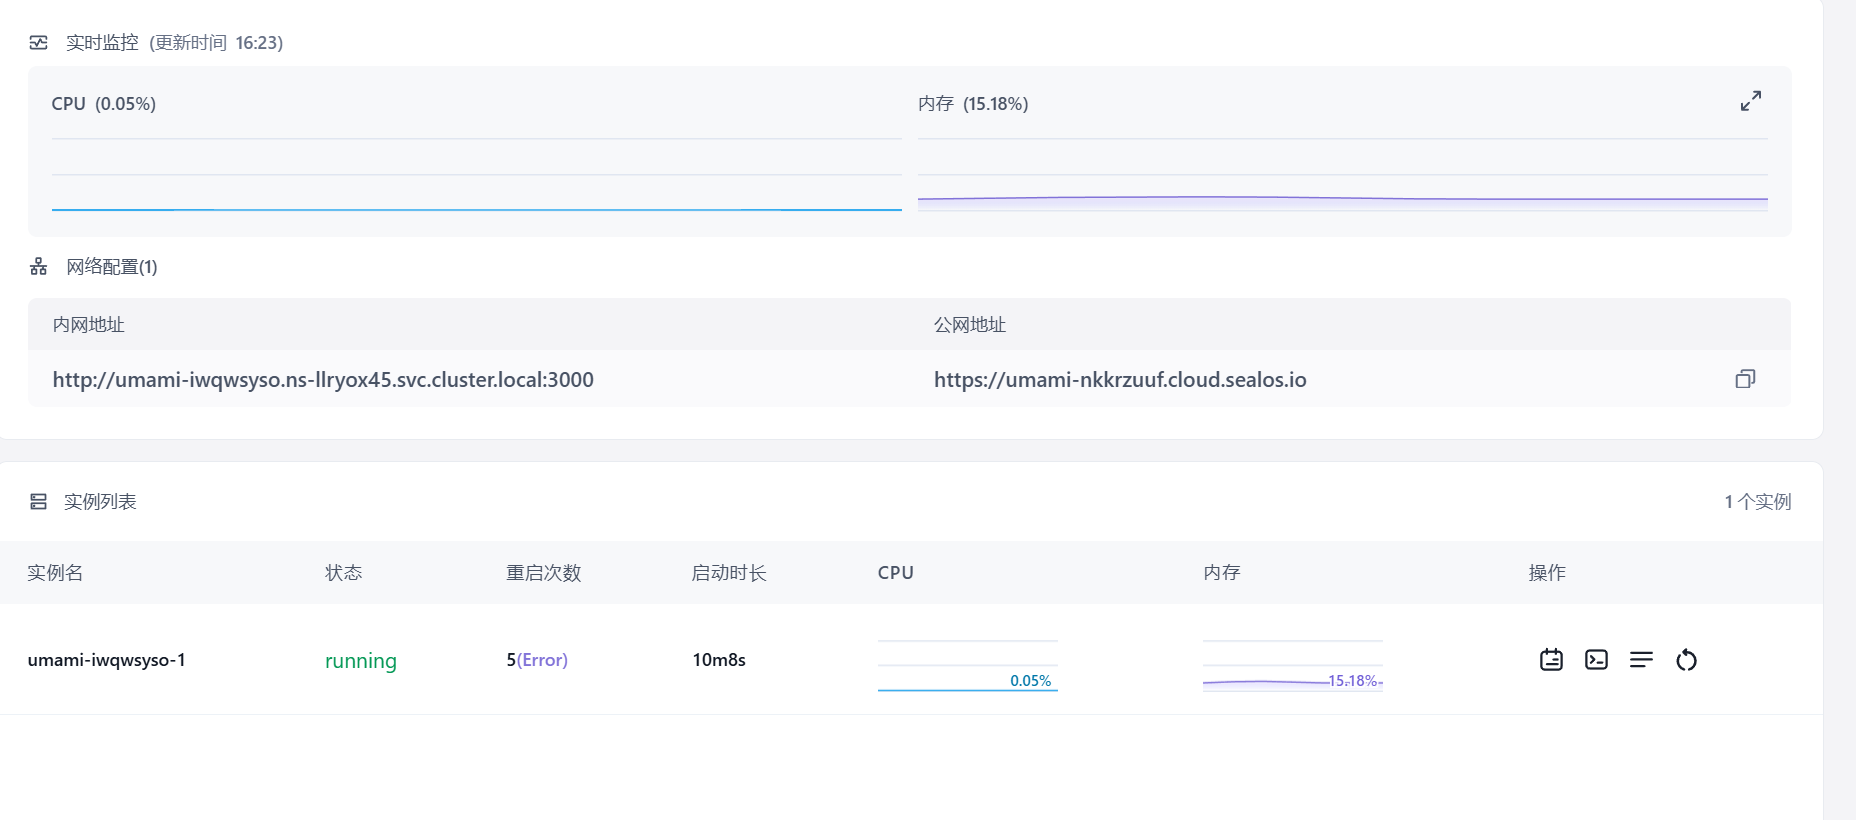
然后到应用管理界面后进入详情页面并查看日志,发现已经可以运行了。
接入Umami
默认用户名 为admin,密码 为umami
Docker+PostgreSQL数据库部署(上面那个要钱)
拉取镜像
docker pull docker.umami.is/umami-software/umami:postgresql-latest
启动数据库
以下是范例
1
2
3
4
5
6
docker run -d --name umami-db \
POSTGRES_USER = umami \
POSTGRES_PASSWORD = umami_password \
POSTGRES_DB = umami \
\
-d:后台运行容器。
–name umami-db:给数据库容器命名为 umami-db。
-e:设置环境变量,包括数据库用户名、密码和数据库名。
-v:创建一个卷来存储数据库数据。
启动umami容器
1
2
3
4
5
docker run -d --name umami \
DATABASE_URL = postgres://umami:umami_password@umami-db:5432/umami \
\
\
要记得在本地开放防火墙3000端口
最后docker ps检查一下容器是否正常运行就可以了
Vercel 自部署 Umami 网站统计服务
懒得写了,看koala
Q
额外功能添加
引入平滑返回顶部按钮
已弃用方案
在icons网站
static/icons文件夹中(其实放在assets/icons中也可以,这样需要用resources.Get引入)
然后我们在baseof.html的body部分中引入back-to-top按钮
1
2
3
4
<!-- 返回顶部按钮 -->
< button id = "back-to-top" class = "back-to-top" >
< img src = "/icons/back-to-top.svg" alt = "Back to Top" />
</ button >
调整和美化
然后在static中创建css文件夹(原因如上)并创建style.css文件,在其中添加以下代码进行美化和调整
 1
 2
 3
 4
 5
 6
 7
 8
 9
10
11
12
13
14
15
16
17
18
19
20
21
22
23
24
25
26
27
28
29
30
31
32
33
34
35
36
37
/* 返回顶部按钮样式 */
. back-to-top {
position : fixed ;
bottom : 50 px ;
right : 420 px ; /* 距离右侧420px */
background-color : transparent ; /* 背景透明 */
color : white ;
border : 2 px solid #4C3384 ; /* 边框颜色 */
padding : 12 px 20 px ;
font-size : 24 px ; /* 字体大小 */
border-radius : 50 % ;
cursor : pointer ;
display : none ; /* 初始隐藏 */
z-index : 9999 ; /* 确保按钮位于顶部 */
transition : all 0.3 s ease ; /* 添加过渡动画 */
}
/* 鼠标悬停时 */
. back-to-top : hover {
background-color : rgba ( 238 , 237 , 231 , 0.6 ); /* 设置背景色和透明度 */
box-shadow : 0 4 px 10 px rgba ( 0 , 0 , 0 , 0.2 ); /* 增加阴影 */
}
/* 鼠标点击时的效果 */
. back-to-top : active {
transform : scale ( 0.95 ); /* 按钮缩小一点,增加点击感 */
}
/* 小屏幕下调整按钮尺寸 */
@ media screen and ( max-width : 767px ) {
. back-to-top {
padding : 8 px ;
font-size : 20 px ; /* 字体更小 */
bottom : 10 px ;
right : 10 px ;
}
}
平滑功能实现
最后在baseof.html的body部分中引入style.css文件并增加平滑回到顶部功能
 1
 2
 3
 4
 5
 6
 7
 8
 9
10
11
12
13
14
15
16
17
18
< script >
// 获取按钮元素
const backToTopButton = document . getElementById ( 'back-to-top' );
// 当用户滚动页面时显示/隐藏返回顶部按钮
window . onscroll = function () {
if ( document . body . scrollTop > 20 || document . documentElement . scrollTop > 20 ) {
backToTopButton . style . display = 'block' ;
} else {
backToTopButton . style . display = 'none' ;
}
};
// 点击按钮滚动到顶部
backToTopButton . addEventListener ( 'click' , function () {
window . scrollTo ({ top : 0 , behavior : 'smooth' });
});
</ script >
现采用方案
先准备好一个svg的图案下载 图案
然后将以下代码复制到layouts/partials/footer/custom.html文件中(没有就自行创建)
 1
 2
 3
 4
 5
 6
 7
 8
 9
10
11
12
13
14
15
16
17
18
19
20
21
22
23
24
25
26
27
28
29
30
31
32
33
34
35
36
37
38
39
40
41
42
43
44
45
46
47
< style >
# backTopBtn {
display : none ;
position : fixed ;
bottom : 30 px ;
z-index : 99 ;
cursor : pointer ;
width : 30 px ;
height : 30 px ;
background-image : url ( {{ (resources.Get "icons/backTop.svg" ) . Permalink } } );
}
</ style >
< script >
/**
* 滚动回顶部初始化
*/
function initScrollTop () {
let rightSideBar = document . querySelector ( ".right-sidebar" );
if ( ! rightSideBar ) {
return ;
}
// 添加返回顶部按钮到右侧边栏
let btn = document . createElement ( "div" );
btn . id = "backTopBtn" ;
btn . onclick = backToTop
rightSideBar . appendChild ( btn )
// 滚动监听
window . onscroll = function () {
// 当网页向下滑动 20px 出现"返回顶部" 按钮
if ( document . body . scrollTop > 20 || document . documentElement . scrollTop > 20 ) {
btn . style . display = "block" ;
} else {
btn . style . display = "none" ;
}
};
}
/**
* 返回顶部
*/
function backToTop (){
window . scrollTo ({ top : 0 , behavior : "smooth" })
}
initScrollTop ();
</ script >
实现了向下移动一定距离就可以出现回到顶部按钮
引入网站计数统计
官网
baseof.html的<head>中添加
 1
 2
 3
 4
 5
 6
 7
 8
 9
10
11
12
13
14
15
16
17
18
19
20
21
22
23
24
25
26
27
28
29
30
31
32
33
34
35
<!-- 不蒜子统计脚本 -->
< script defer src = "https://cn.vercount.one/js" ></ script >
< style >
/* 调整位置和配色 */
# vercount_value_page_pv {
font-size : 16 px ;
color : #f5f5f5 ; /* 设置数值为浅灰色 */
background-color : transparent ; /* 紫色背景 */
padding : 10 px ;
border-radius : 5 px ;
position : fixed ; /* 固定在页面上 */
top : 10 px ; /* 距离顶部10px */
left : 10 px ; /* 距离左侧10px */
z-index : 9999 ; /* 保证它在页面最上层 */
box-shadow : 0 4 px 6 px rgba ( 0 , 0 , 0 , 0.1 ); /* 为容器添加阴影 */
font-weight : bold ;
}
# page-access-info {
font-size : 14 px ;
color : #fff ;
background-color : rgba ( 0 , 0 , 0 , 0.6 ); /* 半透明背景 */
padding : 5 px 10 px ;
position : fixed ;
top : 50 px ; /* 适当调整与页面上方的距离 */
left : 10 px ;
z-index : 9998 ; /* 确保它在数字的下面 */
border-radius : 5 px ;
}
# page-access-info span {
font-weight : bold ;
}
</ style >
然后在<body>部分添加
1
2
3
4
<!-- 页面访问量提示信息 -->
< div id = "page-access-info" >
⬆️该页面访问量< span id = "vercount_value_page_pv" > Loading...</ span >
</ div >
可以实现跟我一样的效果
live2D引入(moc3model)
基本上按照letere的blog
本地模型加载
在static文件夹下创建Resources文件夹,放入项目
resources中的文件
并修改custom.html
 1
 2
 3
 4
 5
 6
 7
 8
 9
10
11
12
13
14
15
16
17
18
19
20
21
22
23
24
25
26
27
28
29
30
31
32
33
34
35
36
37
38
39
40
41
42
43
44
45
46
47
48
49
50
51
52
53
54
55
56
57
58
59
60
61
62
63
64
65
66
67
68
< script >
// 将路径传递到 JavaScript
const cssPath = {{ ( resources . Get "waifu/waifu.css" ). Permalink }}
const waifuTipsPath = {{ ( resources . Get "waifu/waifu-tips.json" ). Permalink }}
const cdnPath = 'https://cdn.jsdelivr.net/gh/letere-gzj/live2d-widget-v3@main' ;
const live2dpath = {{. Site . Home . Permalink }} //自动检测并引入static文件夹中的文件
const config = {
// 资源路径
path : {
homePath : '/' ,
modelPath : live2dpath , //修改处
cssPath : cssPath , //修改处
tipsJsonPath : waifuTipsPath , //修改处
tipsJsPath : cdnPath + "/waifu-tips.js" ,
live2dCorePath : cdnPath + "/Core/live2dcubismcore.js" ,
live2dSdkPath : cdnPath + "/live2d-sdk.js"
},
// 工具栏
tools : [ "hitokoto" , "asteroids" , "express" , "switch-model" , "switch-texture" , "info" , "quit" ],
// 模型拖拽
drag : {
enable : true ,
direction : [ "x" , ]
},
// 模型切换(order: 顺序切换,random: 随机切换)
switchType : "random"
}
// 加载资源并初始化
if ( screen . width >= 768 ) {
Promise . all ([
loadExternalResource ( cssPath , "css" ),
loadExternalResource ( config . path . live2dCorePath , "js" ),
loadExternalResource ( config . path . live2dSdkPath , "js" ),
loadExternalResource ( config . path . tipsJsPath , "js" )
]). then (() => {
initWidget ({
homePath : config . path . homePath ,
waifuPath : waifuTipsPath , //修改处
cdnPath : config . path . modelPath ,
tools : config . tools ,
dragEnable : config . drag . enable ,
dragDirection : config . drag . direction ,
switchType : config . switchType
});
});
}
// 异步加载资源
function loadExternalResource ( url , type ) {
return new Promise (( resolve , reject ) => {
let tag ;
if ( type === "css" ) {
tag = document . createElement ( "link" );
tag . rel = "stylesheet" ;
tag . href = url ;
} else if ( type === "js" ) {
tag = document . createElement ( "script" );
tag . src = url ;
}
if ( tag ) {
tag . onload = () => resolve ( url );
tag . onerror = () => reject ( url );
document . head . appendChild ( tag );
}
});
}
</ script >
博客已稳定运行的显示
显示效果可以在我博客的地步看到layouts/partials/footer/custom.html添加代码,记得修改s1为建站时间,代码参考这里
 1
 2
 3
 4
 5
 6
 7
 8
 9
10
11
12
13
14
<!-- Add blog running time -->
< script >
let s1 = '2024-11-28' ; //website start date
s1 = new Date ( s1 . replace ( /-/g , "/" ));
let s2 = new Date ();
let timeDifference = s2 . getTime () - s1 . getTime ();
let days = Math . floor ( timeDifference / ( 1000 * 60 * 60 * 24 ));
let hours = Math . floor (( timeDifference % ( 1000 * 60 * 60 * 24 )) / ( 1000 * 60 * 60 ));
let minutes = Math . floor (( timeDifference % ( 1000 * 60 * 60 )) / ( 1000 * 60 ));
let result = days + "天" + hours + "小时" + minutes + "分钟" ;
document . getElementById ( 'runningdays' ). innerHTML = result ;
</ script >
在layouts/partials/footer/footer.html里添加以下代码:
1
2
3
4
5
6
<!-- Add blog running time -->
< section class = "running-time" >
本博客已稳定运行
< span id = "runningdays" class = "running-days" ></ span >
</ section >
< section class = "copyright" >
在assets/scss/partials/footer.scss进行风格样式调整,我将计时部分进行了加粗
1
2
3
4
5
6
7
8
9
. running-time {
color : var ( -- card - text - color - secondary );
font-weight : normal ;
.running-days {
font-weight : bold ;
color : var ( -- emphasize - text - color );
}
}
总字数统计:“发表了x篇文章,共计x字”
显示效果如文章最底下显示
 1
 2
 3
 4
 5
 6
 7
 8
 9
10
11
12
13
14
15
16
17
18
19
<!-- Add total page and word count time -->
< section class = "totalcount" >
{{$scratch := newScratch}}
{{ range (where .Site.Pages "Kind" "page" )}}
{{$scratch.Add "total" .WordCount}}
{{ end }}
{{ $totalWords := $scratch.Get "total" }}
{{ $tenThousands := div $totalWords 10000 }}
{{ $remainingThousands := mod (div $totalWords 1000) 10 }}
<!-- 字数统计 -->
<!-- Add total page and word count time -->
< section class = "totalcount" >
{{$scratch := newScratch}}
{{ range (where .Site.Pages "Kind" "page" )}}
{{$scratch.Add "total" .WordCount}}
{{ end }}
发表了{{ len (where .Site.RegularPages "Section" "post") }}篇文章 ·
总计{{ $tenThousands }}万{{ $remainingThousands }}千字
</ section >
在assets/scss/partials/footer.scss里修改风格:
1
2
3
4
5
.totalcount {
color : var ( -- card-text-color-secondary );
font-weight : normal ;
margin-bottom : 5 px ;
}
注意!hugo要用extended版本才可以渲染scss,我重装后因为装了普通版本一直没渲染出来颜色和样式,看了好几次日志才发现
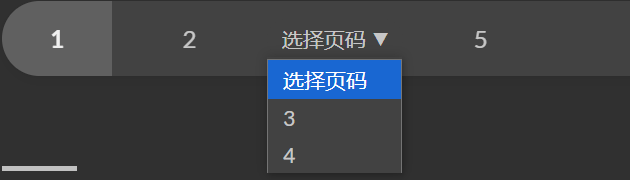
页码跳转效果
修改/layouts/partials/pagination.html文件(没有就添加)
点击展开
 1
 2
 3
 4
 5
 6
 7
 8
 9
10
11
12
13
14
15
16
17
18
19
20
21
22
23
24
25
26
27
28
29
30
31
32
33
34
35
36
37
38
39
40
41
42
43
44
45
46
47
48
49
{{ if gt .Paginator.TotalPages 1 }}
{{ if gt .Paginator.TotalPages 1 }}
< nav class = "pagination" >
{{ $.Scratch.Set "hasPrevDropdown" false }}
{{ $.Scratch.Set "hasNextDropdown" false }}
{{ range .Paginator.Pagers }}
{{ if eq . $.Paginator }} <!-- 当前页 -->
< span class = "page-link current" >
{{- .PageNumber -}}
</ span >
{{ else if or (eq . $.Paginator.First) (eq . $.Paginator.Prev) }} <!-- 首页、上一页 -->
< a class = "page-link" href = "{{ .URL }}" >
{{- .PageNumber -}}
</ a >
{{ else if or (eq . $.Paginator.Next) (eq . $.Paginator.Last) }} <!-- 下一页、尾页 -->
< a class = "page-link" href = "{{ .URL }}" >
{{- .PageNumber -}}
</ a >
{{ else }} <!-- 其他页码 -->
{{ if and (not ($.Scratch.Get "hasPrevDropdown")) (lt .PageNumber $.Paginator.PageNumber) }}
{{ $.Scratch.Set "hasPrevDropdown" true }}
< div class = "page-dropdown-wrapper" >
< select class = "page-dropdown" onchange = "location = this.value;" >
< option value = "#" > 选择页码</ option >
{{ range $i, $pager := $.Paginator.Pagers }}
{{ if and (lt $pager.PageNumber $.Paginator.PageNumber) (not (or (eq $pager $.Paginator.First) (eq $pager $.Paginator.Prev))) }}
< option value = "{{ $pager.URL }}" > {{ $pager.PageNumber }}</ option >
{{ end }}
{{ end }}
</ select >
</ div >
{{ else if and (not ($.Scratch.Get "hasNextDropdown")) (gt .PageNumber $.Paginator.PageNumber) }}
{{ $.Scratch.Set "hasNextDropdown" true }}
< div class = "page-dropdown-wrapper" >
< select class = "page-dropdown" onchange = "location = this.value;" >
< option value = "#" > 选择页码</ option >
{{ range $i, $pager := $.Paginator.Pagers }}
{{ if and (gt $pager.PageNumber $.Paginator.PageNumber) (not (or (eq $pager $.Paginator.Next) (eq $pager $.Paginator.Last))) }}
< option value = "{{ $pager.URL }}" > {{ $pager.PageNumber }}</ option >
{{ end }}
{{ end }}
</ select >
</ div >
{{ end }}
{{ end }}
{{ end }}
</ nav >
{{ end }}
修改assets/scss/partials/pagination.scss文件
点击展开
 1
 2
 3
 4
 5
 6
 7
 8
 9
10
11
12
13
14
15
16
17
18
19
20
21
22
23
24
25
26
27
28
29
30
31
32
33
34
35
36
37
38
39
40
41
42
43
44
45
46
47
48
49
50
51
52
53
54
55
56
57
58
59
60
61
62
63
64
65
66
67
68
69
70
71
. pagination {
display : flex ;
background-color : var ( -- card - background );
box-shadow : var ( -- shadow - l1 );
border-radius : var ( -- card - border - radius );
overflow : hidden ;
flex-wrap : wrap ;
.page-link {
padding : 16 px 32 px ;
display : inline-flex ;
&.current {
font-weight : bold ;
background-color : var ( -- card - background - selected );
color : var ( -- card - text - color - main );
}
color : var ( --card-text-color-secondary );
}
}
/* 默认深色模式 */
. pagination {
display : flex ;
justify-content : left ;
align-items : center ;
gap : 15 px ;
}
/* 下拉菜单容器 */
. page-dropdown-wrapper {
position : relative ;
display : inline-flex ;
align-items : center ;
gap : 5 px ; /* 调整...和下拉菜单之间的间距 */
}
/* ...样式 */
. page-dropdown-dots {
color : var ( -- card - text - color - secondary ); /* 使用主题文字颜色 */
font-size : 14 px ;
cursor : pointer ;
}
/* 下拉菜单样式 */
. page-dropdown {
background-color : var ( -- card - background );
color : var ( -- card - text - color - secondary );
border : 1 px solid var ( -- card - border - color );
border-radius : var ( -- card - border - radius );
padding : 5 px 25 px 5 px 10 px ; /* 调整内边距 */
font-size : 14 px ;
cursor : pointer ;
appearance : none ; /* 移除默认下拉箭头 */
-webkit- appearance : none ; /* 兼容Safari */
-moz- appearance : none ; /* 兼容Firefox */
outline : none ; /* 移除聚焦时的默认轮廓 */
}
/* 下拉菜单的箭头图标 */
. page-dropdown-wrapper :: after {
content : "▼" ;
position : absolute ;
top : 50 % ;
right : 10 px ;
transform : translateY ( -50 % );
pointer-events : none ; /* 防止箭头图标干扰点击 */
color : var ( -- card - text - color - secondary );
font-size : 12 px ;
}
最终显示效果
折叠块效果
基于stack_overflow
/layouts/shortcodes/details.html下添加
1
2
3
4
5
< h {{ . Get 0 }} id = "{{ anchorize (.Get 1) }}" > {{ (.Get 1) | markdownify }}< /h{{ .Get 0 }}>
< details >
< summary > 点击展开</ summary >
{{ .Inner | markdownify }}
</ details >
这样这个shortcode就可以在文章中使用了< details >和 < /details > (两个都要裹在{{}}内部才可以)中间插入想要折叠的部分就可以了,具体效果上面就有
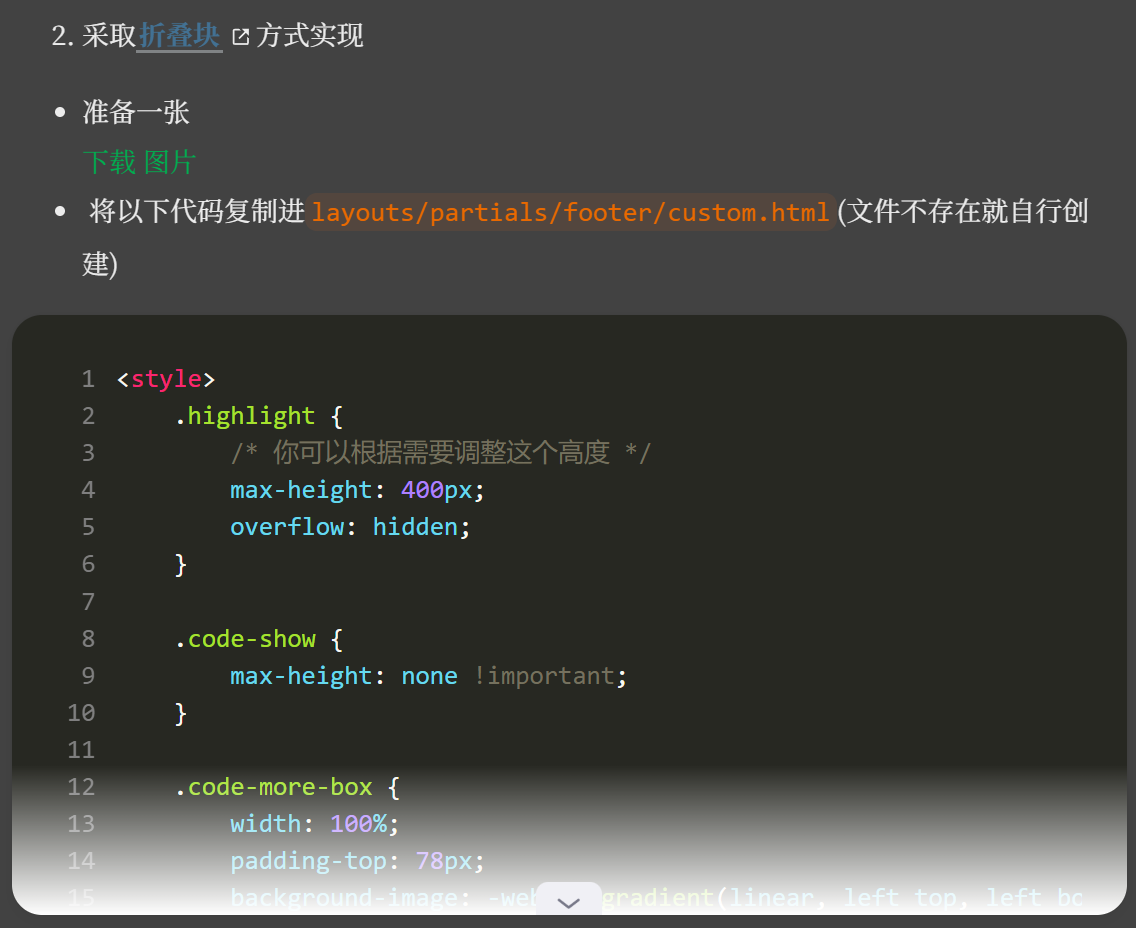
采取折叠块
准备一张下载 图片
将以下代码复制进layouts/partials/footer/custom.html(文件不存在就自行创建)
 1
 2
 3
 4
 5
 6
 7
 8
 9
10
11
12
13
14
15
16
17
18
19
20
21
22
23
24
25
26
27
28
29
30
31
32
33
34
35
36
37
38
39
40
41
42
43
44
45
46
47
48
49
50
51
52
53
54
55
56
57
58
59
60
61
62
63
64
65
66
67
68
69
70
71
72
73
74
75
76
77
78
79
80
< style >
. highlight {
/* 你可以根据需要调整这个高度 */
max-height : 400 px ;
overflow : hidden ;
}
. code-show {
max-height : none !important ;
}
. code-more-box {
width : 100 % ;
padding-top : 78 px ;
background-image : -webkit- gradient ( linear , left top , left bottom , from ( rgba ( 255 , 255 , 255 , 0 )), to ( #fff ));
position : absolute ;
left : 0 ;
right : 0 ;
bottom : 0 ;
z-index : 1 ;
}
. code-more-btn {
display : block ;
margin : auto ;
width : 44 px ;
height : 22 px ;
background : #f0f0f5 ;
border-top-left-radius : 8 px ;
border-top-right-radius : 8 px ;
padding-top : 6 px ;
cursor : pointer ;
}
. code-more-img {
cursor : pointer !important ;
display : block ;
margin : auto ;
width : 22 px ;
height : 16 px ;
}
</ style >
< script >
function initCodeMoreBox () {
let codeBlocks = document . querySelectorAll ( ".highlight" );
if ( ! codeBlocks ) {
return ;
}
codeBlocks . forEach ( codeBlock => {
// 校验是否overflow
if ( codeBlock . scrollHeight <= codeBlock . clientHeight ) {
return ;
}
// 元素初始化
// codeMoreBox
let codeMoreBox = document . createElement ( 'div' );
codeMoreBox . classList . add ( 'code-more-box' );
// codeMoreBtn
let codeMoreBtn = document . createElement ( 'span' );
codeMoreBtn . classList . add ( 'code-more-btn' );
codeMoreBtn . addEventListener ( 'click' , () => {
codeBlock . classList . add ( 'code-show' );
codeMoreBox . style . display = 'none' ;
// 触发resize事件,重新计算目录位置
window . dispatchEvent ( new Event ( 'resize' ))
})
// img
let img = document . createElement ( 'img' );
img . classList . add ( 'code-more-img' );
img . src = {{ ( resources . Get "icons/codeMore.png" ). Permalink }}
// 元素添加
codeMoreBtn . appendChild ( img );
codeMoreBox . appendChild ( codeMoreBtn );
codeBlock . appendChild ( codeMoreBox )
})
}
initCodeMoreBox ();
</ script >
效果呢就像这样
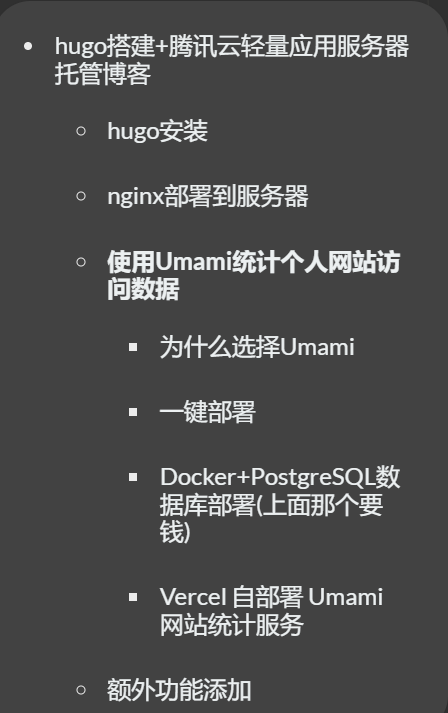
目录折叠效果
添加代码到layouts/partials/footer/custom.html
 1
 2
 3
 4
 5
 6
 7
 8
 9
10
11
12
13
14
15
16
17
18
19
20
21
22
23
24
25
26
27
28
29
30
31
32
33
34
35
36
37
38
39
40
41
42
43
44
45
46
< style >
# TableOfContents > ul , ol {
ul, ol {
display : none ;
}
. open {
display : block ;
}
}
</ style >
< script >
function initTocHide () {
// 判断是否存在文章目录
let toc = document . querySelector ( ".widget--toc" );
if ( ! toc ) {
return ;
}
// 监听滚动
window . addEventListener ( 'scroll' , function () {
//清除class值
let openUl = document . querySelectorAll ( ".open" );
if ( openUl . length > 0 ) {
openUl . forEach (( ul ) => {
ul . classList . remove ( "open" )
})
}
// 获取active-class
let currentLi = document . querySelector ( ".active-class" );
if ( ! currentLi ) {
return
}
// 展示子ul
if ( currentLi . children . length > 1 ) {
currentLi . children [ 1 ]. classList . add ( "open" )
}
// 展示父ul
let ul = currentLi . parentElement ;
do {
ul . classList . add ( "open" );
ul = ul . parentElement . parentElement
} while ( ul !== undefined && ( ul . localName === 'ul' || ul . localName === 'ol' ))
});
}
initTocHide ()
</ script >
这样就会在没滑到的情况下不展开
添加notice chat timeline样式块
即Github markdown形式的shortcodes
左右的聊天气泡
上下一条线的时间线显示
原方法来自koala-一些短代码
layouts/shortcodes下创建chat.html放入样式代码,通过调用shortcodes进行使用
谢谢!


